Showing posts with label Preparing for Spring Real Estate Market. Show all posts

Wednesday, March 30, 2011

Neutral Paint A Stylish Way to Wow Buyers


Paint is the easiest and least expensive way to transform your space for staging or living. Even the smallest, room can look spacious and bright with the right paint choice. Neutral color with white ceilings appeal to a wider range of potential buyers. This color combo will make your space appear clean, light and spacious.  

If budget is a concern opt to paint the kitchen and bathroom these areas draw the most notice from potential buyers. The best type of paint to use in these areas would be semi gloss because it can be washed, wiped and is resistant to moisture. Flat is recommended for the rest of the house.

 Don’t forget to fresh up the trim and baseboards too, I recommend you keep them light as well. This will draw the eye to the windows and doors rather then stopping the eye. White trim will make your space feel fresh, bright and contemporary.

Staying neutral is important because it reflects move in ready which most buyers are looking. Colored wall can leave buyers wondering how hard it will be to paint over not to mention if it will match their current furnishings.

 An all white color scheme can be bright and refreshing in a house but in a condo it can look sterile and incomplete. Instead choose shades that are creamy or off white.

Accent colors are the best way to liven up your neutral color scheme. You can go bold with color in small doses. A great way to add color is with cushion, decor items and artwork. Adding an accent color is a stylish and fun way to add some visual interest to your neutral color scheme. By keeping your color in small proportions you are able to change the color to stay current with trends or the season.

Elysse Bulloch

Tuesday, March 15, 2011

Pillow Talk


Have you ever thought about the impact pillows have on your space? If you’re trying to sell your home pillows can make the whole space come together changing the feel of your space. Since you only get one chance to make a first impression let’s take a look at do and don’t of pillows to ensure your home sends "buy me" signals.

Something you should look for when choosing pillows is the size and scale compare to the sofa. You don’t want to lose seating because your pillows are too big. Pillows are meant to be an accessory. Like wise you don’t want the pillows to be too small either. Try to pick a size that will compliment your sofa. I like to layer bigger pillows with smaller pillows to give depth and variety.

Don’t be afraid to choose different textures and print, this is a great way to dress up a contemporary sofa. Use color blocks, often the same color scheme looks great even thought the prints don’t match.

Pillows are a bit of an investment so look for pillows that have a zipper, this way you change up color for the season or mood. I recommend down filled pillow because they can be washed and they will never lose shape lasting you a life time.

Don’t over due it; pillows with fringe, sequins and appliqué are to busy and too much. For staging I prefer to stick to solid color,so they do not distract the buyer. Don’t over due the amount of pillows either too many pillow tend to look messy and also take away from your seating. If you have to move pillows to sit comfortably you have too many. I like to group pillows in odd numbers as it is more pleasing to the eye.


Elysse Bulloch

Thursday, March 10, 2011

Cleaning Tips to Prepare for The Spring Market


When buyers get more serious about making an offer they start looking closer and closer at the property. At a closer glance buyers can get scared away if appliances are not well maintained. Red flags are raised and buyers wonder if sellers are hiding anything else, stop these thoughts in there tracks by making sure everything is Q-tip clean.

 Spring cleaning time is fast approaching especially if you’re trying to get your home ready for the spring market. The one thing that seems to always be the “to do list” is to clean the oven. We all hate cleaning the oven, procrastination makes this worse. The longer you put it off the harder the job gets.

Without proper maintenance the oven vents clog up and the oven will start to smoke. Here is a step by step guide to cleaning your oven chemical free. If you clean your oven after every use, you will never need to spend hours scrubbing away again.

For gas stove tops remove all grate and griddles and wash in hot soapy water. Scrub with a scouring pad; dry all part thoroughly before putting back. Look for blockage on all fuel parts use a paper clip to free blockage. For spills soak a cloth in hot soap water and place on the spill let the water penetrate the spill for a few minutes. Remove build up with a rubber scraper. Wipe the surface clean with a damp sponge. Make sure the sponge is not to wet ,excess water can damage the igniter on glass or ceramic stove tops.  

If you have an electric stove top the first thing to do is remove the coil and reflector bowls, wipe coil with a damp sponge. Clean out the reflector bowls with hot soapy water and a scouring pad. I you have build up on the coils put the stove top back together and turn the burns on high let the build up burn off.

Now for the hardest part cleaning the oven, starts by removing the racks .Soak them in hot soapy water using a scoring pad to remove splatter build up. If you have heavy build up sir together ¾ cup baking soda and 1/4 cup water Smooth paste all over oven accept the door. Let sit a few hours or over night. Wipe out with a damp cloth, repeat to remove any streaks. The oven door should be cleaned with equal parts water and white vinegar. The baking soda mixture can run down in between the glass which can only be removed if the oven door is taken apart.


Now that you have tackled the oven, you might want to start on the microwave. In just 5 to 10 minute it can be sparkling too. The easiest way to clean the microwave is to prepare a bowl with one cup water and 1/2 cup lemon juice, the lemon juice act as a deodorizer. Heat the bowl for three minutes and let sit in the microwave for 5 minutes. The stream will loosen build up. Wipe out the inside of the microwave with a sponge dipped in warm soapy water. Clean the control panel with a very damp cloth.


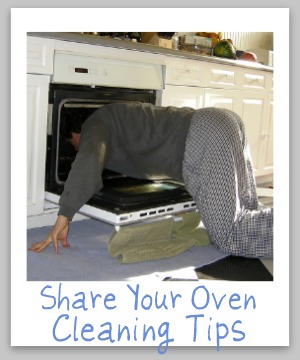
Please feel free to share your oven cleaning tips. Look forward to hearing what works for you.

Elysse Bulloch